If you are wondering how to sign up for Google Analytics or why it is important, you have come to the right place. Below, we explain how to set up Google Analytics, delve into its value and explain a couple important components of this essential tool for business/website owners and webmasters.
Why is Google Analytics Important?
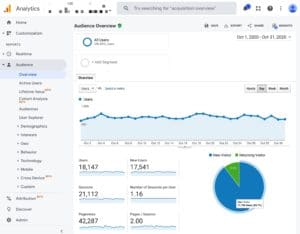
Google Analytics Overview Page
Google Analytics is essential for businesses to grow and gain the insight necessary to understand their site’s visitors interactions with their website. Whether you are launching a company or are already a part of an established business, you can benefit from Google Analytics. This valuable tool provides you with essential information pertaining to visitor data, and will help you understand the type of activity that occurs on your website. You may not be enthusiastic about deeply analyzing the data, you should still give Google Analytics a try and get a general overview of how your clients are using your website.
With Google Analytics, you’ll develop a much more thorough understanding of:
The behavior of your online visitors
The user experience on your website
The merits/flaws in your online content
What kinds of devices (phones, tablets, laptops, computers) that access your website
How to Sign up for Google Analytics
1. Setup Google Tag Manager
Start by setting up Google Tag manager that pulls data from your site, sending it to other platforms including Google Analytics and Facebook Analytics. This way, you can update/add tags to the Google Analytics code without resorting to manually writing code. Create an account through the Google Tag manager dashboard, enter your nickname and click “Continue”. Then, you’ll set up a container that contains the tags for your site, click “Create”!
You’ll then be given the container’s two code snippets. There’s one part that goes in the “<head>” tag of your page, and a second immediately after the “<body>” tag. Copy and paste these bits code (or keep this page open and start up a new browser tab). We’ll use the code later and paste it into your site.
(Why setup Google Tag Manager? Because when you want to add Facebook Analytics, or any other tracking code, all you need to do is make changes in your Tag Manager–you won’t need to make manual updates to your site!)
2. Setup Google Analytics
The next step is to setup your Google Analytics account. So, head over to the Google Analytics page. You’ll get to a page where you need to enter your website’s name, your account name (usually just your company or personal name) and the URL of the website. Choose your site’s industry category along with the time zone. Then, just review the terms of service and you will be provided with a tracking ID — you’ll need this tracking ID too!
3. Setup your Analytics Tag
Now, you’ll need to head back over to Google Tag manager. Once you’re on the site, click on the “Add a new tag” link you’ll see on the overview page. You’ll be redirected to a page to create the new site tag and customize its triggering along with its configuration. Click on “Tag Configuration” and select “Universal Analytics”. At this point, you will select the type of information you would like to track. Click “Google Analytics Setting”, select “New Variable”. You’ll get to a new window where you’ll need to type in your unique Google Analytics tracking ID (found in step 2 above).
Finally, head back to the “Triggering” area and choose the data to be sent over to Google Analytics. Click “All Pages” so information from every page is sent for analysis. Click “Save”… and you’re done with the setup!
4. Add the Code to Your Site
This can be the tricky part… you may need to edit some code manually. As mentioned in step 1 above, you’ll need to put that first bit of code into the “<head>” tag of your site, and that second bit just after the “<body>” tag–and you need to make sure that the code is on every page of your site!
Using WordPress and a theme like the very popular Divi, it’s as simple as heading to the “Integration” tab on the “Theme Options” page!
If you need a few tips on how to add the code, go ahead and contact us. We’re happy to help!
Set some Goals!
Finally, don’t forget to establish goals for Google Analytics. This is your opportunity to highlight performance indicators for your specific website, empowering Google to gauge your site’s success or lack thereof. When in Google Analytics, click “Admin” in the lower left, click “Goals” on the right side and establish new goals. Save the goals and Google Analytics will begin tracking them for you!
A Quick Overview of the Google Analytics Home Screen
The homepage is essentially a brief summary of your website’s performance. Use this information to monitor the metaphorical “health” of your website and also to gauge whether the site is performing as you’d hope. The home screen can also be used as a launching pad for in-depth analysis of your site’s analytics
The “Users”
The “Users” section of the homepage shows the total number of people who have visited your website.
The “Sessions”
The “Sessions” section of the home screen displays the aggregate number of visits made to the site. However it is important to distinguish between users and sessions. For example, if a user visits your company’s website today and once again tomorrow, it counts as a single user but two unique sessions.
The “Bounce Rate”
The “Bounce Rate” is a metric that gauges the percentage of visitors who arrive on your site, and then leave the site without clicking on any other pages.
The “Session Duration”
The “Session duration” metric tells you the average length of each visitor’s session in total number of hours:minutes:seconds spent on the site.
Need help setting up analytics on your site! Contact Us and we can help today!